Previously, we discussed types of cannabis plants, seeds, and soil. Here, we will talk about germination, as this is the starting point after obtaining your seeds.
Germinating the Seeds
There are a few ways you can plant your marijuana seeds. Here we will discuss the quick method of germinating them with paper towels, water, and peat pellets, in the soil, and planting the seeds directly in the ground.
Paper Towel Method for Germination
You can kick-start your seeds by placing them between paper towels. I tried this method and didn’t have much luck after moving the sprouts to the pots, but this is one of the most popular methods. You will need a paper towel, a plate, a Ziploc baggie big enough to hold the plate, and clean water.
Germination: STEP 1
Wet the paper towel on the plate—it should be completely wet but not drenched. Drain any excess water.
Germination: STEP 2
Place the seeds on the towel and fold over so the seeds are tucked (sandwiched) inside.
Germination: STEP 3
Place the plate, towel, and seeds inside the Ziploc baggie and seal.
Germination: STEP 4
Set them in a dark area with a room temperature of approximately 22 degrees Celsius. Check once a day to make sure the paper towel is still wet. After a few days, they should be sprouting and ready to transfer to your potting soil.
A disadvantage of this method is that the root hairs can get stuck to the paper towel and cause a risk of tearing off the whole root. (This has happened to me, which is another reason I don’t care for this method.)
The Water Method for Germination
Germination: STEP 1
Fill a glass with tap water and allow it to reach room temperature (approximately 18 degrees Celsius).
Germination: STEP 2
Add a couple of seeds into the water (change the water every other day). After a couple of days, seeds will pop open and sprout a tiny root. You can place it in soil any time, but it is best to wait until the roots are about 2 to 3 millimetres long and plant with the root facing down.
The disadvantage to this method is that the seedlings need to be handled, and the roots are very fragile, so any damage can affect plant development.
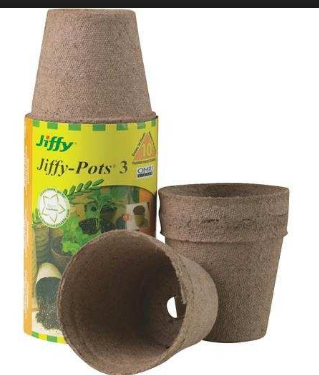
Peat Pellet Method for Germination
Peat pellets are easy to use and have a good germination rate, so it is ideal for the beginner because they are already optimized for germinating cannabis with a pH of 5.5. It is not recommended for hydroponic setups.
Germination: STEP 1
Your pellets will be dry when you first purchase them so you need to get them wet but NOT soak them. Slowly pour one cup of water over them. After a few minutes, they will expand.
Germination: STEP 2
Plant your seeds about ½ inch deep, placing one seed in each pellet. You might have to use your finger and gently poke it. Gently cover each seed with the surrounding soil. If you have a kit with a dome, you can place that over them because they love humidity. Make sure they do not dry out.
Germination: STEP 3
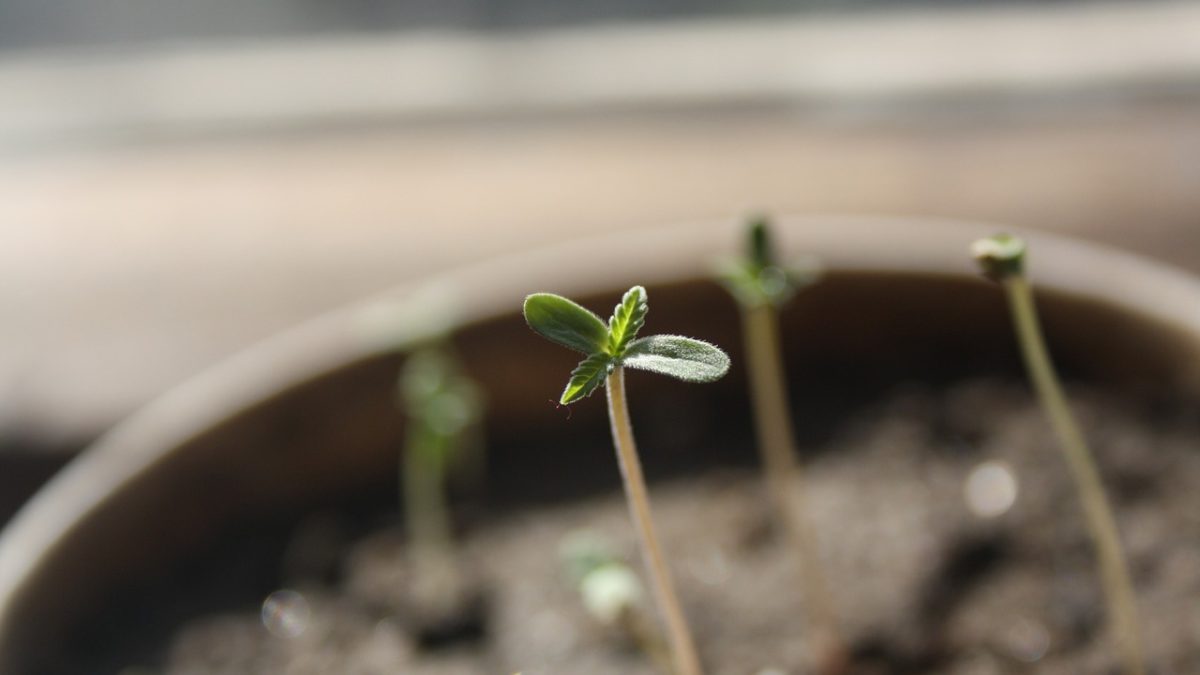
Between 2 and 8 days, your seedlings will start popping out of the pellets. Once this happens, they can be placed in soil, pellet and all, where they can get lighting.
The Soil Method for Germination
This method requires good-quality soil, small pots (peat moss recommended), clean water, and seeds.
For this article, we will assume these are feminized seeds and will be planting one seed per pot. (If you have no idea what type of seeds you have, you may have to plant several and separate them later.)
Germination: STEP 1
Get your soil ready. In Part 1, we showed you a video on how to make your own 100% organic soil. The soil should have a pH of approximately 6. Do not add nutrients for at least the first two weeks.
Germination: STEP 2
Fill each peat moss pot loosely with soil until about one-half inch from the top. Soil does not need to be packed tightly.
Germination: STEP 3
Water each pot thoroughly with clean water before adding the seeds.
Germination: STEP 4
Once the soil is in place, make a small hole about 1.5 cm deep (you can use your finger or a pencil). Place one seed in the hole, cover it with the soil, and press lightly with your fingers. That’s it! There is no need to fool around with it anymore. Add a little more water to each pot.
Place pots under a fluorescent lamp (it is best to avoid a windowsill as the temperature will fluctuate). The ideal temperature of the soil is around 22 degrees Celsius. The humidity of the air is important and should be 70–80%.
Keep an eye on the soil, as you want it to stay moist. Once your plants are 5 to 10 centimetres tall, move to a larger pot.
Planting Seeds Directly in the Ground
If you are the neat type of gardener, you will most likely want to plant your garden in an orderly fashion, ie rows or hills. The hills are good because the water will drain off and the seeds won’t be saturated in water. If you use the hills or rows, the seeds should have enough soil to stay moist.
However, if discretion is necessary, arrange them among your other plants (tomatoes, flowers, etc.). You would be surprised at how inconspicuous they can be.
Planting directly into the soil will remove the worry of transplanting your seedlings, which can be stressful.
Remember that it is difficult to maintain suitable temperatures, lighting, and watering. You must also wait until the final frost has passed.
Holes should be approximately 20 inches deep and 20 inches in diameter to accommodate each plant and approximately 4-5 feet apart. Once the hole is dug, you can fill it with nutrients (organic soil) by mixing it with the removed soil. Then make a hole about 1.5 cm deep (you can use your finger or a pencil). Place one seed in the hole, and cover it with the soil. That’s it! There is no need to fool around with it anymore. Water it well.
Depending on the climate, more water may be needed.
Challenges to Growing Outdoors
-
The Right Climate
Extreme temperatures can be harmful—too hot (above 30 degrees Celsius) can cause plants to stop growing, while below 12 degrees Celsius can cause stunting or severe damage. Excessive wind and rain can affect yield or cause mould.
The amount of daylight is another important factor. If you have a ‘green thumb,’ you will know how much sunlight you have in your area. If not, it might be wise to research and find out. Plants should have a minimum of 5 hours of direct sunlight and an additional 5 hours of indirect sunlight.
-
Location, Location, Location
Ensure plants are in the best place, free from anything that might prevent the sunlight. Having as much sun as possible will make for happy, productive plants.
Is privacy a concern? If so, consider how visible they will be. Remember, they can grow well beyond 8 feet, so you might want to think about fencing or tall trees to hide them.
-
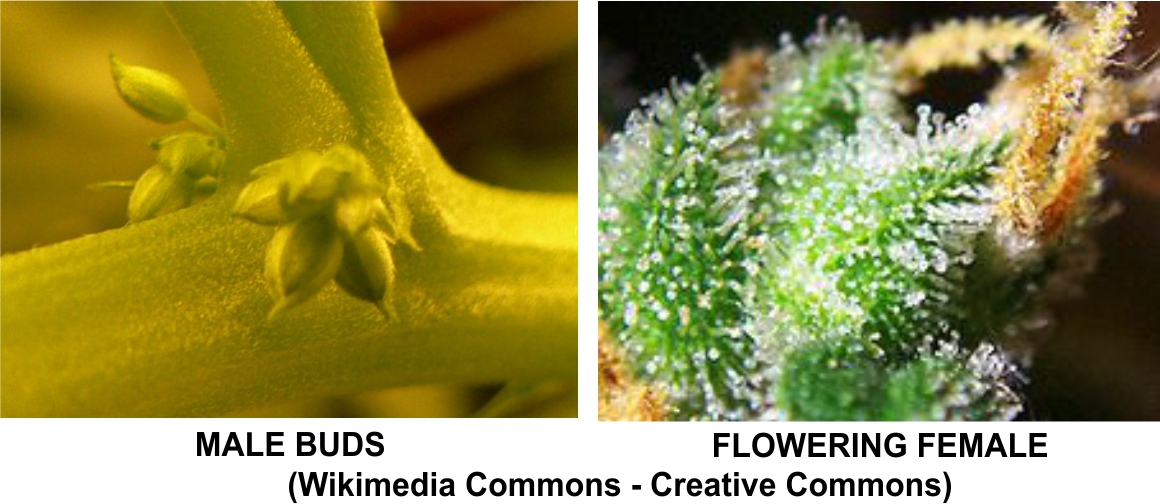
Male or Female
Unless you start with feminized seeds, you will have no idea what sex your plants are, so you will have to separate the males from the females (by removing the males). As a beginner, you might want to take the guesswork out and start with feminized seeds.
-
The Right Soil
The right soil is important. Refer back to Part 1 for the various types of soils and which are the best for your cannabis plants. Rich soil with good drainage is ideal.
-
Fertilizer – do you need it?
The three most important nutrients for your plant’s success are nitrogen, phosphorus, and potassium. Look for inexpensive fertilizers; talk with some experts. Look for natural and organic fertilizers.
-
Containers
Don’t have space but still want to take advantage of the outdoors? Maybe you have a spot on your deck, patio, or rooftop. The advantage of containers is moving them around to get the most sunlight or protection from weather elements such as high winds or heavy rain. The larger the container, the larger the plant – a 10-gallon would be a good size.
-
How Much Water
While sunlight is important, so too is watering. If you live in a hot climate, daily watering could be needed. Drainage could be an issue if you live in a rainy area. What type of water are you using? If it is tap water, does it contain a lot of minerals or chlorine?
-
Pest Control
Inspect your plants often to ensure they are strong and healthy. Organic pesticides are available and specifically designed for cannabis.
As you can see, growing outdoors presents challenges but can also be rewarding.
ADDITIONAL NOTES
· Seed Sprouting Kit
Give your seedlings the best start! The Super Sprouter Premium Heated Propagation Kit w/ T5 Light will make your life easier, especially if you plan to grow many plants.
Features of the Super Sprouter include:
- Ultra-clear vented dome and built-in light track channels
- Fluorescent grow light
- Double thick tray with no holes—10 x 20 inch
- Heat mat
Benefits of the Super Sprouter include:
- Faster-growing and stronger roots
- Inserts provide safe support
- Plug trays provide quick and easy germination
- Includes booklet with expert advice to start your seedlings
Note: This kit can sprout seeds such as flowers or vegetables.
-
Purchasing Feminized Seeds
Note: If you are interested in purchasing feminized seeds, here is the link that we mentioned in Part 1:
I Love Growing Marijuana (based in the U.S)
Note: It is wise to check the legalities of purchasing cannabis seeds in your own country or region before you order.
Final Thoughts
Whew! We sure covered a lot of information. You have several ways to germinate your seeds. Some points to remember:
- Minimal handling—handle your marijuana seeds/seedlings as little as possible.
- Temperature control – the ideal temperature is around 22 degrees Celsius (seeds don’t need light to germinate; they need heat).
- Moisture is important – it is needed so the seed can expand and pop through its shell.
- Plant feminized seeds if possible.
And have fun!!
This post contains affiliate links, which means I may earn money from products and services you purchase through my links.
Now that you know how to germinate your seeds, we will discuss transplanting your babies and lighting in our next article.
Have you had any difficulties when it comes to transplanting? Let us know in the comments below.
Mary Ann shares her passion and personal experience with CBD and medical cannabis as well as the experiences of others. Do visit regularly to find out the ins and outs of CBD and medical marijuana products. If you are passionate about something and would love to share it on your own website, then click here to get started.
